Use
Using WinFE
After creating the WinFE media, usage is just the same as any other forensic boot disk. Firstly, you must establish how to make the computer boot from external media such as USB or CD/DVD. click here to view common manufacturers boot menu option keys.
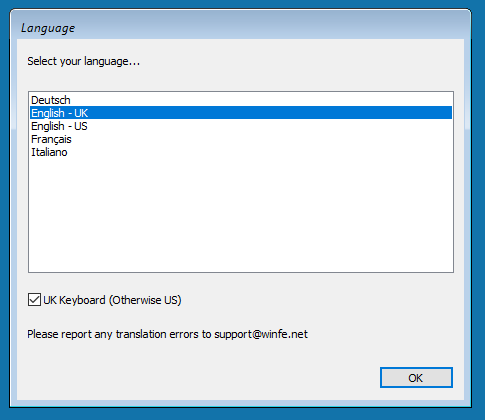
Once loaded, you will be presented with a menu to select your language and keyboard layout. By default, it's English (UK) language and English (UK) keyboard.
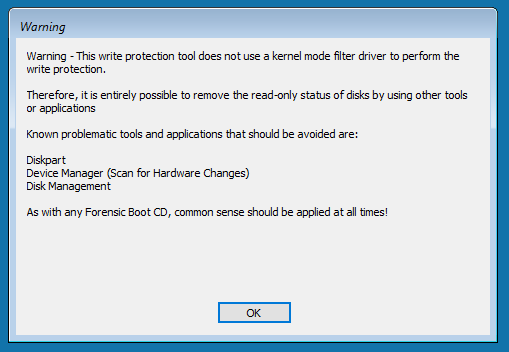
You will now be shown a warning with regards to applications that if used, may change the read/write status of attached disks. It should be noted that this list is not exhaustive.
WinFE will display the disks that it was possible to enumerate, and the current state of these disks. Ideally, all disks should be in a state of read-only and dismounted.
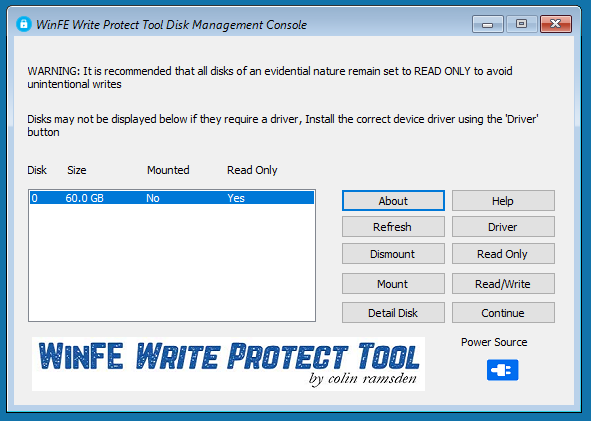
You should now change the status of your bootable WinFE USB HDD/Flash Drive to be mounted and read-write (this step is not applicable to optical media). Then click Continue to allow WinFE to load, when loaded multiple tools and applications are available from the menu located at the top of the screen.
If no other disks, or an incorrect number of disks are displayed, this could be because of several reasons.
1. The Hard Disk Drive or RAID controller requires a driver.
2. There are no other Hard Disk Drives present or they are not connected.
3. The Hard Disk Drive within the computer maybe broken.
Disk Tools
The write-protect tool can be accessed from the Disk Tools menu to allow you to change the status of Hard Disk Drives beyond the initial changes that you may have made.
Within this menu option is a basic disk imaging tool, there is no real need to use this tool on Intel x86 or x64 builds, it was designed for the ARM build where FTK Imager does not (yet) exist. This is currently the only viable option for forensically imaging an ARM computer or server.
Password Tools (Deprecated at the Moment)
The password tool is currently deprecated due to incompatibility with later versions of Windows 10 onward. When I get the time, I will revisit this.
Arsenal Remote Agent
The AIM Remote Agent is now inluded in the Intel x86/x64 build. It is located in the folder entitled 'Tools -> x86' and 'Tools -> x64', which can be found in the root of the WinFE USB Flash Drive that you produce.
It should be noted, that at the time of writing, the AIM Remote Agent is a Release Candidate (RC) version, therefore, it may be prudent to visit the Arsenal Recon website and obtain the latest version of this tool. (located with in the 'remote' folder of the Arsenal Image Mounter zip file).
In order to use the AIM Remote Agent with WinFE, you will need to mount the WinFE USB Flash Drive after it's has booted to acccess the 'Tools' folder. It goes without saying that a functioning network adaptor is required on the target computer (wired only, WiFi is not supprted within the Windows Windows Preinstallation Environment).
Other Tools
These will be covered in brief, as many of them have multiple functions or it is obvious what they do.
Command Prompt - Standard Windows Command Line Interface.
Configure Network - PE Network has been included should you wish to utilise a wired network.
File Explorer - Explorer++ has been included as Windows Explorer is not available within WinPE.
Install Driver - Will allow you to install a driver for missing hardware, the .inf file along with any dependencies is required for this to work.
Notepad - This is the standard Microsoft Windows Notepad application.
Registry Editor - This is the standard Microsoft Windows Registry Editor application.
Windows Defender - This is no longer included within the build process, it is entirely possible to achieve, however, it a laborious, convoluted process that would have taken too long to write a guide for.
BitLocker Encryption
Support is included for BitLocker encryption, either implemented on the harvest Hard Disk Drive or capturing an encrypted source drive.
In order to capture an encrypted source drive, it must NOT be imaged as a physical disk. It must first be brought online (mounted) with the write-protect tool, there is no need to make the source drive read-write, then image as a logical volume using FTK Imager.
BitLocker encrypted ARM systems must be imaged as a physical disk, then retrospectively decrypted.
The steps to capture a BitLocker source drive are as follows:
1. Identify the disk which contains the BitLocker encrypted volume.
2. Use the write-protect tool to mount the entire physical disk, leaving it as read-only.
3a. Open a Command Shell window, if you have the BitLocker recovery key, type:
manage-bde.exe -unlock <Volume Letter>: -recoverypassword 123456-123456-123456-123456-123456-123456-123456-123456 <Enter>
Or
3b. Open a Command Shell window, if you have the BitLocker password, type:.
manage-bde.exe -unlock <Volume Letter>: -password <Enter>
4. You will now be prompted to enter the BitLocker password.
5. Image the unlocked logical volume using FTK Imager.
To mount your own BitLocker protected harvest Hard Disk Drive, follow these steps:
1. Identify the Hard Disk Drive which contains your harvest volume.
2. Use the write-protect tool to mount and change the status to read-write.
3. Open a Command Shell window, and type the following:
manage-bde.exe -unlock <Volume Letter>: -password <Enter>
You will now be prompted to enter the BitLocker password.
The harvest Hard Disk Drive unlocked volume can now be used as an imaging destination.